RAPPEL BACKUPS – Do’s and Don’ts
From Rock & Ice Magazine
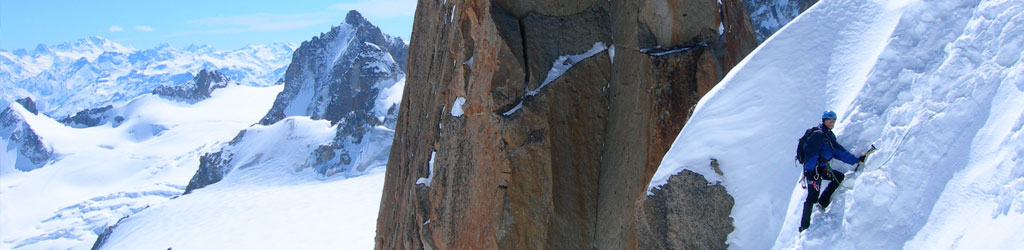
Of the myriad ways to kill yourself climbing, rappelling is the quickest, one of the most common, but also the easiest to avoid.
FRICTION KNOTS vs. ASCENDERS
Both the friction knots (i.e. Klemhiest, autoblock, prusik, etc) and an ascender are serviceable backups, but only when rigged properly and their limits understood. A friction knot has the advantage of easy availability: You can tie one from almost any bit of cord or sling (but not Kevlar, Spectra or Dyneema, which will slip); it’s lightweight, cheap, and has no mechanical parts to break or foul up; and it works on single and double ropes. It also grips in any direction, which is handy for backing up traversing raps. Perhaps best of all, you can put a friction knot on the rope above or below your rappel device (more later). A friction knot’s limitations are largely determined by user error. If you rig the friction knot sloppily, fail to snug it up, or don’t wrap it enough times around the rope (at least three), it won’t grip. Certain friction knots also can be difficult to set up with one hand, according to how experienced and the climber’s dexterity.
An ascender, such as the Jumar, Clog, or any similar mechanical rope clamp, is easy to attach to the rope with one hand, and is the common backup on big walls, where you often zip down fixed single ropes tied together. An ascender simplifies having to pass knots joining two ropes together.
The obvious disadvantage to an ascender is that it doesn’t work on double-rope rappels. Petzl offers a double-rope rappel backup, the Shunt, but it is a highly specialized device, one you’re not likely to carry at all times. An ascender’s other flaw—apparent as soon as you attempt to use it as a backup—is that it will only work on the rope above your rappel device because it’s always either fully locked or fully open, and must be manually held open during the descent: You can’t squeeze an ascender in your brake hand as you can a friction knot, letting the rope slip through. Being forced to keep the ascender on the rope above your rap device creates problems, some surmountable, some not (more below).
BACKUPs USED ABOVE THE DEVICE
In the 1970s, we were taught to place the friction knot backup on the rope above the rappel device, which at the time seemed simple and logical. But, after many incidents in which a friction knot backup seized and the suspended climber was unable to release it (which has resulted in suffocation and other issues), this system was the subject of much debate. What use was a backup, some argued, if it could kill you?
Today, none of us is apt to die this way because we more wisely attach our backup to leg loops. Still, a backup friction knot palced on the rope above your rappel device can leave you in a pickle. For instance, make your connecting sling too long—even a few centimeters can be too much— could allow the ascender or friction knot to shoot out of reach, cinch up, and leave you stuck, dangling on the rope. Or, even if you dial the sling length perfectly, the friction knot or ascender can lock up and leave you lacking a second ascender or friction knot —unable to unweight and release it. Stranded again, due to poor planning, poor application, and/or being untrained to rectify such a situation. We have also seen hair caught in a backup used above the rap device….
Ascender use: If you use an ascender backup, keep its connecting sling short so you can easily reach it at its maximum weighted extension. Also, always have a second ascender or friction knot with a spare sling available. Then, if your backup locks and you are unable to release it, you can rig a standard ascender setup and jug to freedom. To avoid all of the above issues, simply use a friction knot backup, and place it on the rope below your rappel device, attached to the brake-side leg loop.
BACKUPs USED BELOW THE DEVICE
Set your backup friction knot on the rope below your rappel rig and you can loosely grip it in your brake hand, which encircles both the friction knot and the ropes. The preferred and simplest knot for this is the auto-block. Each time you release the friction knot, letting it lock, you can easily loosen it again with one hand and resume your rappel. Despite this system’s advantages, some people find this backup method awkward, usually because either the friction knot is tied incorrectly (too long or too tight), or the backup is located incorrectly. So avoid these two problems:
Problem 1: Do not clip the friction knot to your harness’ belay/rappel loop. From there, it will either get sucked into your device, creating a terrible mess, or ride into/ against your device, which will hold the friction knot open, preventing it from cinching and acting as a backup. In live drop tests where the friction knot was clipped under the rappel device and to the rappel/belay loop, the backup failed 100 percent of the time if it reached the rappel device! Instead, clip the friction knot to the leg loop on the same side as your brake hand. While a single leg loop might not be quite as strong as a belay/rappel loop, and hanging by one leg loop isn’t ideal, a friction knot here cannot ride up into your rappel device, assuming you have your friction knot length adjusted correctly.
Problem 2: Make certain the friction knot’s extended loop length is not too long (long enough to reach the rap device). Shorter is better. Tie the loop too long and the friction knot can still slide up and jam against your rappel device, where it will be held open, rendering it ineffective. It is important to adjust the loop to the perfect length while hanging safely in your harness (NOT while actually rapping!). Some harnesses have elasticized leg loops and are not recommended for this reason.
In summary, micromanage your backup properly by doing everything the same way each time. Clipping the friction backup knot to your leg loop is just as easy and less problematic than clipping it to your belay/rap loop, and getting the correct sling length is a simple matter of proper pre-adjustment. Eventually a friction knot sliding down the rope will wear out at some point, depending on the type and size of the cord or webbing, how tightly you cinch the friction knot, how fast you rap, and how often. Ideally, pre-rig the backup friction knot out of 5mm Perlon, which is strong and supple; otherwise, in an emergency situation, you can use whatever slings or webbing are on hand. Keep an eye on your friction knot backup, and inspect it before and after every rappel.
SINGLE VS. DOUBLED ROPE
Backing up a rappel on two strands of rope isn’t much different than the technique for a single rope: Wrap your friction knot around both ropes, and short-clip it to a leg loop. You may need to add a friction knot wrap or two, or remove one, to get the friction knot to slide when you hold it loosely, yet grip when released.
ROPE-END KNOT, YOUR LAST RESORT
No backup can perform a miracle if you rappel off the end of your rope, one of the most common ways that people die rappelling. Therefore, you should always tie a knot/s in the end of your rope. The knots will stop you when they jam in your rap device, assuming you hit them before you hit the ground. Tying a knot into the end of your rappel rope takes only seconds—there’s simply no rationale not to.
Remember: always untie the end knots before you pull your rappel ropes so a rope end does not jam at the anchor. For the end knot itself, tie a bulky figure-8-on-a-bight or other bulky knot, which will not pull through your rappel device, even under pressure. Do not use a single overhand knot, which can extrude through certain rappel devices, and easily squirts through the carabiner brake. Use a figure-8 or double/triple fisherman’s instead. Additionally, do not tie the ends of a double rope together, or they will twist around themselves like mating serpents. Instead, tie a knot in the end of each rope, which will let the ropes spin freely, working out any twists created as you rappel.
BE SMART
Use a backup every time you rappel—whether you’re in a hurry or not, whether the rappel seems rote or sketchy, or whether you’re one pitch up or 20. Rappelling even once without a backup is both unnecessary and potentially life-threatening.